Introduction
In the following tutorial, we will explore how to model scaffolding structures in SkyCiv as well as complete scaffolding design relating to European, Australian, and US codes.
This tutorial includes a step-by-step guide on:
- Modeling and analyze scaffolding structures in SkyCiv S3D
- Designing scaffolding structures
- Performing Connection Force Analysis
- Generate Reports
Not featured in this article: you can also run the design as a standalone calculator, via Quick Design from the SkyCiv Dashboard. This is also available as a free tool: Scaffolding Calculator

To start out, open Structural 3D to begin modeling your scaffolding structure. You can use imperial or metric units depending on if you are planning to analyze against US or European/Australian standards, respectively. You can modify the units for your model by going to settings > unit system and selecting metric/imperial.
Modeling Scaffolding Structures
The scaffolding structure will be modeled using member elements. Firstly, we define the nodes for the start and end points of the member. To create the nodes, go to the Nodes menu. From this menu, we can input the X, Y, and Z coordinates for each node individually, clicking Apply for each node to add them to the model.
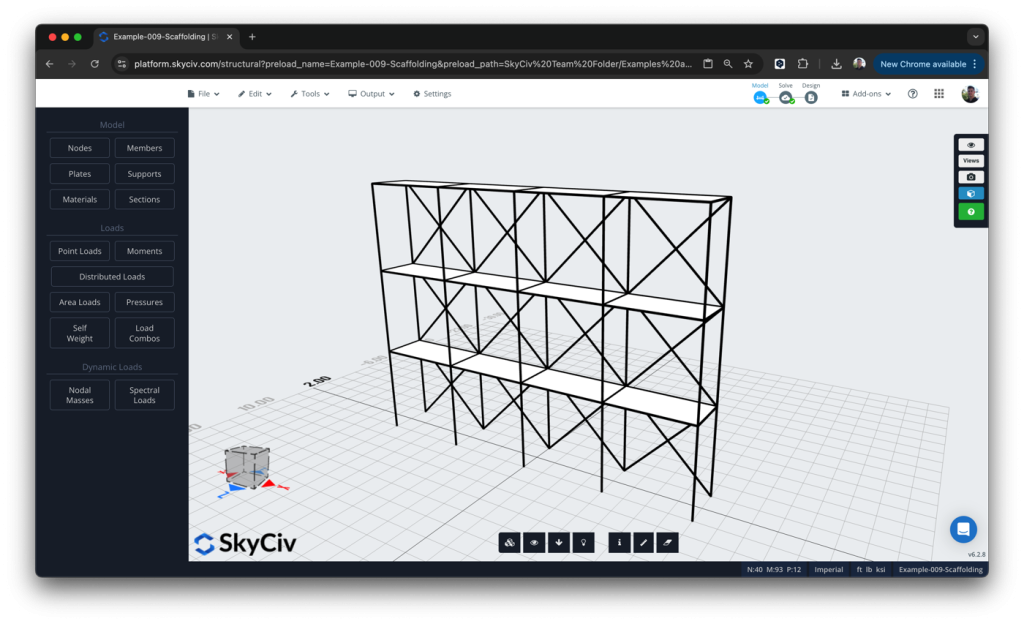
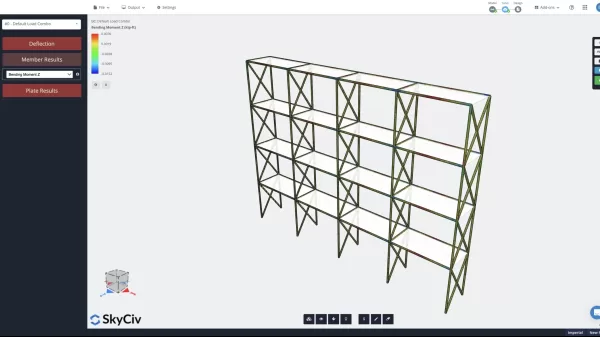
Your final step in modeling will be determining the section for each member. It is critical that the material chosen for your section is steel, as this is the only material that matches up with the material you will utilize to design with the integrated Scaffolding Design calculator. As the Scaffolding Design calculator evaluates steel members, you must ensure that the material you have chosen for your section (and in turn, the sections you choose for each member) matches correctly.
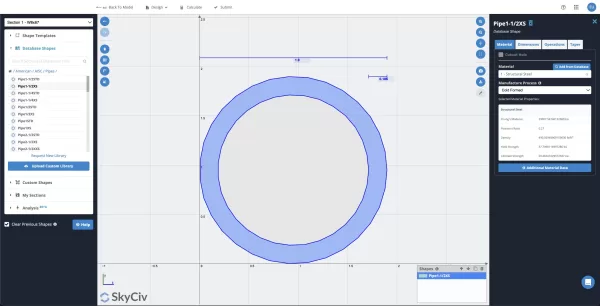
Additionally, the Scaffolding Design calculator is designed to check hollow circular sections only. So it is critical that the section you choose in this step is also hollow and circular. Some common sections used in scaffolding design are:
- HSS1.900×0.120 for Bracing Members
- HSS1.900×0.188 for Vertical/Horizontal Elements
Once you have chosen the right section for each member and modeled your entire structure, it is time to analyze your design and complete your design checks.
Analyzing Your Design
Before analyzing the model, we also want to apply some loads. In our example we are taking common OHSA load bearing calculation values:
- Light Duty – 25 pounds per square foot.
- Medium Duty – 50 pounds per square foot.
- Heavy Duty – 75 pounds per square foot.
After finishing your modeling, you can click on the “Solve” bubble in the top right corner. This will perform the structural analysis of the scaffolding structure, evaluating the material strength, inputted loads, and support conditions. Once this is done, S3D will show you the final solved model. If you run into any errors, the dialogue box will let you know how to address them to move forward with your design.
Launching Scaffolding Member Design
The last step is launching the Member Design module for scaffolding design. Once you click on the “Design” bubble in the top right corner, it will launch a dialogue box asking you which design module you would like to use to analyze your structure. Select “Other Design” to launch the list of available design modules.
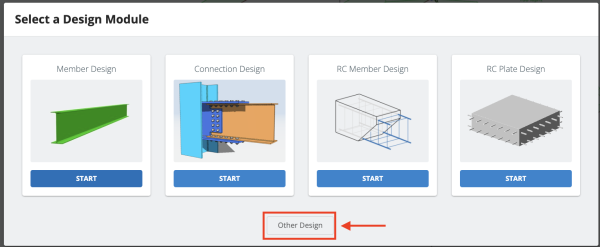
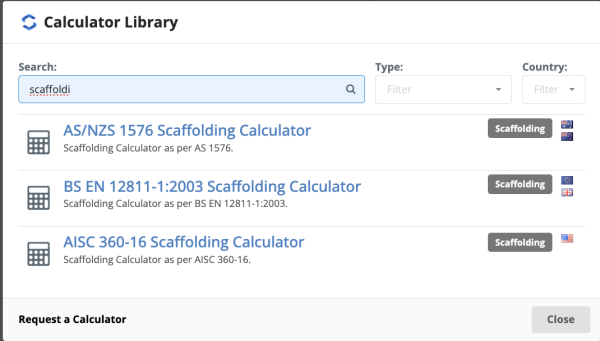
From here, you can select one of the three available Scaffolding Design Calculators. At this time, scaffolding design calculation in SkyCiv is available for AZ/NZS 1576, BS/EN 12811-1:2003, and AISC 360.
Be sure that, in your model, the scaffolding members are made up of circular, hollow, steel sections. If your sections or material has not been chosen correctly, you may get the error: “No Members Imported. Please check that your sections are circular hollow and materials are set to ‘steel’.” If you get this error, navigate back to the “Model” step, go back into Section Builder, and update your scaffolding members’ sections accordingly.
Generating Reports
Once you have launched the Scaffolding Design calculator, you can see if each member is passing or failing based on the design checks the calculator has performed. At any time, you can click the “X” in the top right-hand corner of the calculator to return to S3D and update your design further.
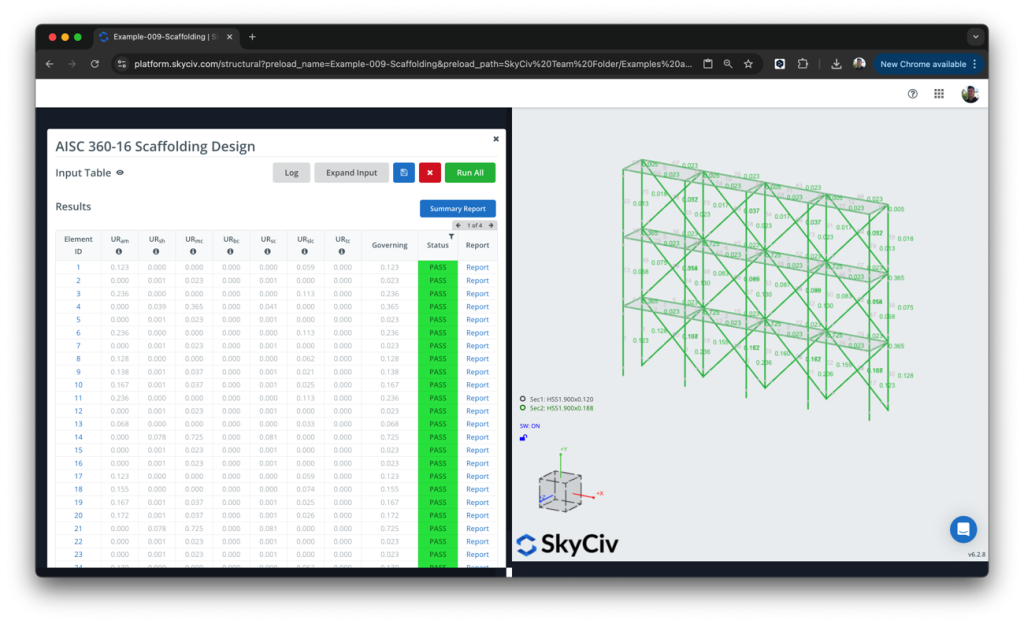
Additionally, you can click on the “Summary Report” button to view a report on all the members or view detailed calculations with hand calcs and code references by clicking on the “Report” button next to any of the individual members.
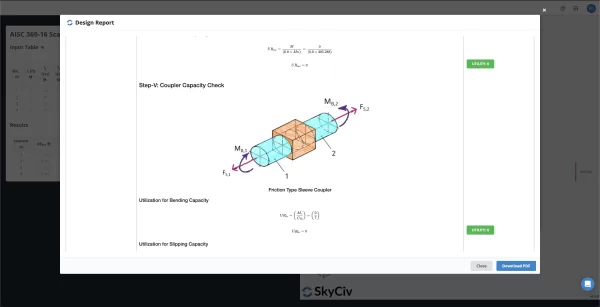
Within the report, you can see a more detailed breakdown of each specific design check to further inform your design choices as you work to optimize your scaffolding structure. You can print this report and use it or the summary report, when putting together a summary of your calculations. Congratulations! By following this scaffolding design calculation example, you now have successfully completed the design of a scaffolding structure!
Bonus: SkyCiv Command Shortcuts
Here is a summary of some of the keyboard shortcuts we used during the course of this tutorial. If you want to learn more about our Keyboard Shortcuts or SkyCiv Operations to speed up your modeling process, be sure to check out the links to those pages below.
- Ctrl + A: Select All
- Ctrl + C: Copy (selected parts of the structure)
- Ctrl + V: Paste (part of the structure copied)
- Ctrl + Z: Undo
- Ctrl + Y: Redo
FAQ
1. What design standards can the scaffolding design module check against?
Currently, the integrated Scaffolding Design module for S3D can check against European (BS/EN 12811-1:2003), US (AISC 360), and Australian (AZ/NZS 1576) design standards.
2. Can I share my model with a colleague or coworker?
Definitely! After saving your file, you can go to File -> Share and then select how you would like to share your file. If the users do not have SkyCiv accounts, you can share a link so they can view your file.
3. How do I sign-up for SkyCiv and how much does it cost a month?
You can sign up for SkyCiv at any time by navigating to our SkyCiv Pricing Page.
Our pricing depends on whether you are a Professional, Student, or Enterprise user as well as if you would like to sign-up for a flexible month-to-month license or a 12-month contract. You can read more about our terms and pricing options at the link above.


